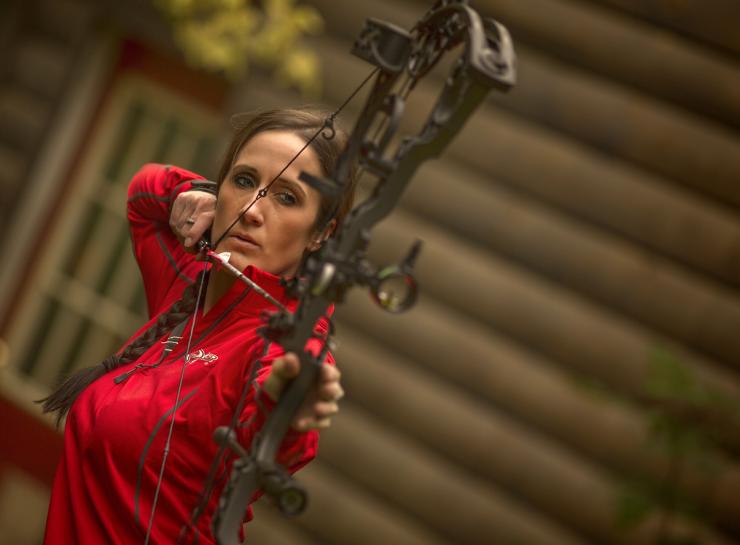
Good form leads to good groups. (Melissa Bachman photo)
Shooting a bow well is no different than swinging a golf club with precision—for that perfect hit, it takes finesse and proper technique for smooth, accurate execution. This is why professional coaching is such a craze in golf — practice doesn’t make perfect — perfect practice makes perfect. If more archers would seek coaching, they’d eliminate a lot of frustration, just as amateur golfers do.
The problem is, archery has fewer coaches readily available compared to golf. What eventually happens is that nearly all archers, even pro shooters, end up coaching themselves. The good news is that it can be done as long as you have a thorough understanding of what makes up good shooting form and how the mind works, so you can teach yourself properly.
KNOW THE MIND
According to avid tournament shooter and bowhunter, Darin Cooper believes accuracy starts with understanding the mind.
“The average shooter can never unlock his or her potential without knowing how their mind works as it relates to shooting a bow,” said Cooper. “Ultimately, it has control over your success and failure.”
Cooper breaks the mind into two parts — the conscious and subconscious. The conscious can only think about one process at any given time, while the subconscious is a multi-task, super-efficient computer system; it can control thousands of processes all at the same time.
To train yourself to shoot right, you must use close-range shooting practice — which is best done with your eyes closed.
Experts call it “blind bale” shooting. This type of practice allows the conscious mind to adopt new skills but, through repetitive practice, allows the new skills to become absorbed by the subconscious, storing them in its intricate, highly-sophisticated memory bank. From here, the subconscious is best left alone so it can perform these tasks without interruption. The subconscious works in harmony this way. This is very important to recognize and is where most archers go wrong.
By keeping your eyes closed, you stop the conscious mind from doing what it usually does — aiming at the target. By doing this, you free it for use. Now you can focus on another task, something in your shooting form you want to improve.
For example, if you’re trying to improve your follow-through after the shot, place all your attention (conscious mind) on keeping your bow arm up after the release of the arrow. You should keep thinking and focusing on this over and over until the subconscious incorporates the new technique, logging it away. With enough repetition, the mind and muscle memory will take on the new habit and you will no longer have to worry about it.
Psychologists say it takes about 21 days to learn a new habit, so if you recognize several faults in your shooting form, you’ll have to spend a lot of time on the blank bale until programming takes effect.
“It’s wise to tell yourself when you make a good shot,” said Cooper. “This kind of positive pep talk sends a message to the subconscious, confirming that all things are in order. This will boost progress.”
BASICS OF GOOD FORM
“The saying that archery is 90 percent mental and 10 percent physical is true only for those that have good shooting form,” said Cooper. “For the average bowhunter, however, the physical part plays a much larger role since shooting form can be improved upon.”
Here are some fundamental basics that make up good shooting form:
Stance: All highly successful archers use a comfortable, solid stance. To achieve a good stance, position your feet shoulder width apart, with your body weight equally distributed between the balls and midsection of your feet.
Exactly how you place your feet in relation to the target is subjective. My advice is this — find a place with a safe backstop, close your eyes and then draw your bow. Move your feet around until you find the most comfortable position for your feet. Now open your eyes and note the direction of the bow’s aim and the position of your feet. Take an arrow and lay it on the ground, with the tip pointing at the aiming spot and the fletch-end of the arrow parallel with the tip of your right shoe (for a right-handed shooter). This is your new stance.
Bow Grip: There are many ways to hold a bow grip, but only one specific spot on your hand will prevent torque. Randy Ulmer identifies this one spot as where the radius bone meets the palm—the precise location where the hand won’t change positions when pressure is applied to it. This spot is located at the base of the thumb, right near the “lifeline.” (See photo for example).
To achieve such a grip, place your hand in the grip by rotating your thumb slightly so it’s angled outward. Rotating the hand slightly also increases the clearance between the bowstring and your forearm, lessening the chance of contact with a bulky jacket sleeve.
From here, simply relax your fingers so they hang limply along the handle or tuck in two or three of your fingers into your palm, allowing your index, and one other finger perhaps, to loosely wrap around the riser of the bow. Using a bow sling is very important, since it removes all fear of dropping the bow.
Bow Arm: Most archers utilize the wrong muscles to shoot with, most notably the deltoid muscle, which is what you use as soon as you begin to raise the bow-arm shoulder. This is a mistake since it creates tension and a wobbly sight picture.
A low, locked bow-arm shoulder ensures less muscle use, creating more of a bone-to-bone contact, which also steadies your aim. To familiarize yourself with this posture, simply extend your arm and hold your hand out (as if you are holding a bow and preparing to shoot). If your elbow is locked, bend it so it just unlocks — no more. Note the position of your shoulder; it should be low and relaxed. Now press down on the top of the bow-hand shoulder where it meets your arm. Use your release hand to do this. You’ll notice it won’t move — it’s locked. This is the way you should hold your bow to shoot.
Draw Length: Proper draw length is critical. The best way to identify proper draw length is to observe the shooter from the side and also from the rear. From the side, the draw-arm elbow should be even or slightly above the arrow. Facing the back of the shooter’s head, the elbow should be in line with the arrow, not to the left or right.
Shot Anchor: Brace your release hand somewhere along the jawbone. This is the best place since it allows great repeatability while keeping your hand forward enough to allow good use of your back muscles. Don’t press hard against the side of your face, just firmly enough to keep things consistent. Pressing hard into the face causes left and right shots, since it’s easy to vary hand pressure, shot to shot.
Also, use a three-point anchor for consistency. Most experts use the “web” of their draw hand wrapped or braced against the jawbone, bowstring to tip of nose, and sight pin in middle of peep or pin guard. (Some hunters also use a kisser button for a four-point system).
Follow-Through: A good follow-through is pretty simple; it means your bow-arm stays up until impact of arrow in the target and your release hand brushes against the side of your face and lands in the same spot behind your head.
AIMING TIPS
Once your sight reaches the target, DO NOT aim! Simply acquire the target with your sight pin and send the message to your subconscious to start tightening those back muscles. Once this is done, now you can consciously aim at the target, allowing the rest to just happen, all at the mercy of the subconscious.
Accuracy is all about aiming. This means burning a visual hole exactly where you want the arrow to hit. The finer the aim, the better the results. From here, trust that the trigger will break smoothly based on hours of shot training, particularly on a close-range target. At this point, don’t think about the release, or your release hand, or your finger on the trigger—ever—but only the aiming process. If you do mentally drift away for a split second, think about the pressure in your back muscles, and do your best to increase this pressure, almost to the point where you feel a burn.
PULLING THE TRIGGER
Back tension: When using back tension to trigger the shot, use only your draw-side rhomboid muscles to pivot your shoulder. These large, powerful muscles are located closest to your spine. This allows for “pulling” rather than a “pushing and pulling” motion, which is what you get when you use both sides of the rhomboids. This ensures consistency since pushing the bow arm out can cause irregular release pressure and left and right hits.
Come down on target: Most experts believe drawing with your sights just above the target and then lowering the sight pin into the bull’s eye is best since it requires less use of your arm muscles. This keeps you more relaxed and steadier on target.
Hook the trigger: When using a wrist-strap release, shorten the stem or strap on the release so that your finger has a deep grip on the trigger. This will allow you to form a “hook” using your finger. Note: the trigger should cross somewhere between the first and second knuckle. This makes trigger feel less sensitive and allows you to fire the trigger using your back, facilitating a surprise release.
DON’T HOLD TOO LONG
All shooting pros agree that a delayed, subconscious shot is good, but you don’t want to over-hold either, which can cause problems.
“When shooting, I exhale as I draw the bow, take a full breath as I pre-load into the cam’s wall at anchor, and then get the trigger pre-loaded,” said Cooper. “From there, I try to shoot within 7 to 8 seconds. If not, I let down.
“Five to 7 seconds is a good goal for executing the shot once you hold your breath, because your visual acuity will start to decrease rapidly after 7 seconds. More training and better fitness will allow you a slightly longer window.”
Mike Slinkard believes his aiming ability is degraded after 6 to 8 seconds. This is why he prefers to shoot in about 5 seconds from the time he gets steady and on target. Any hold beyond 8 seconds and he either lets down or starts the aiming process all over again with a new breath of air.
Everyone will have a slightly different shot window, so experiment using this advice.

Hi, this is a comment.
To get started with moderating, editing, and deleting comments, please visit the Comments screen in the dashboard.
Commenter avatars come from Gravatar.